Summary
In order to run the report Statement of Cash Flows, you must first create Cash Flow Groups and assign all of your Balance Sheet G/L accounts to one of the groups.
Set-Up Instructions
Custom: Set-up cash flow groups to suit your or your financial parties preferences. You'll need a good understanding of how this type of report works as well as knowledge about where each account should be assigned.
Quick: Use the 'level 3' G/L account categories for your cash flow group codes, names and sorts. You can use the image below as a guide.
Open the Cash Flow Groups table
- Administration > Setup > Financials > Cash Flow Groups (NOT 'Cash Flow Line items')

- Administration > Setup > Financials > Cash Flow Groups (NOT 'Cash Flow Line items')
Create a Code, Name and Sort Order for each group
- Code: numbers or letters up to 30 characters
- Name: numbers or letters up to 100 characters
- Sort Order; number
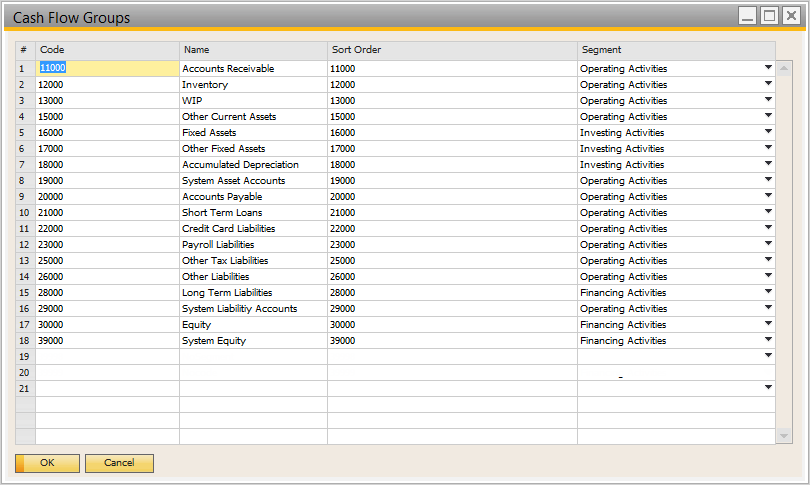
Choose a segment to the group. (Choose from Operating, Investing or Financing Activities)
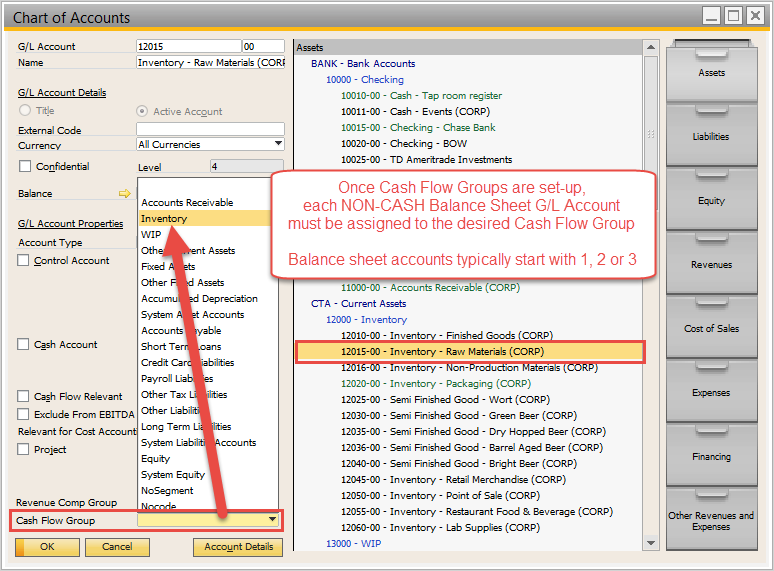
Assign ALL NON-CASH Balance Sheet G/L account to one of the new Cash Flow Groups
- Balance Sheet accounts will typically start with 1, 2 or 3. (Assets, liabilities and equity)
- Be sure to include all "System" accounts
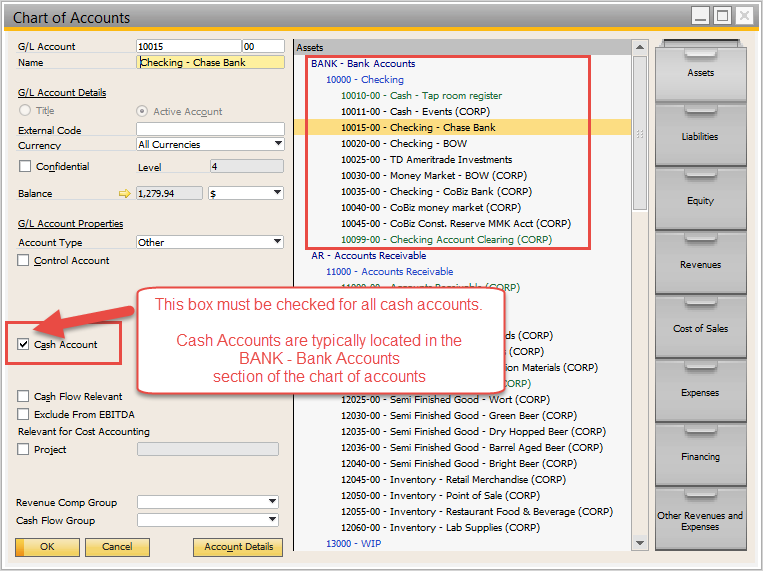
- Do not include the accounts flagged as "Cash Account" usually in the G/L group: BANK - Bank Accounts.
An account should have an assigned Cash Flow Group OR have the "Cash Account" box checked, but not both.