Details
The Yeast Scheduler consists of two main areas, the Yeast Schedule & Selection screens and the fields on the Brew Sheet that display the yeast linked to the production order. The main purpose of the Yeast Scheduler is to allow the user to easily see all batches of beer in fermenter that can be used as a source of yeast for brews that are planned, and then to select the desired batch, thereby linking it to the brewing production orders.
Launching the Yeast Scheduler
In Main Menu, go to Production > Production Forms > Yeast Schedule
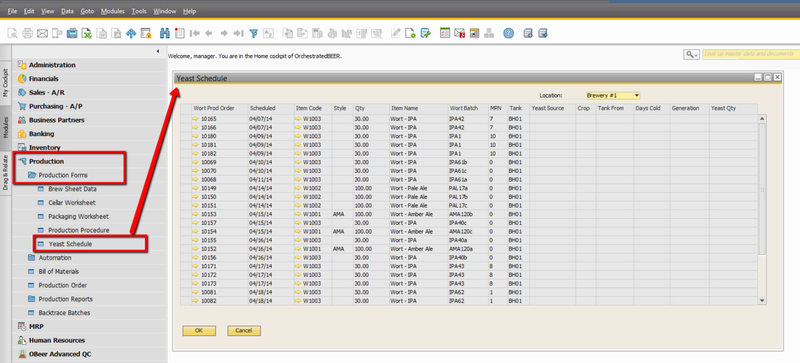
Yeast Schedule Screen
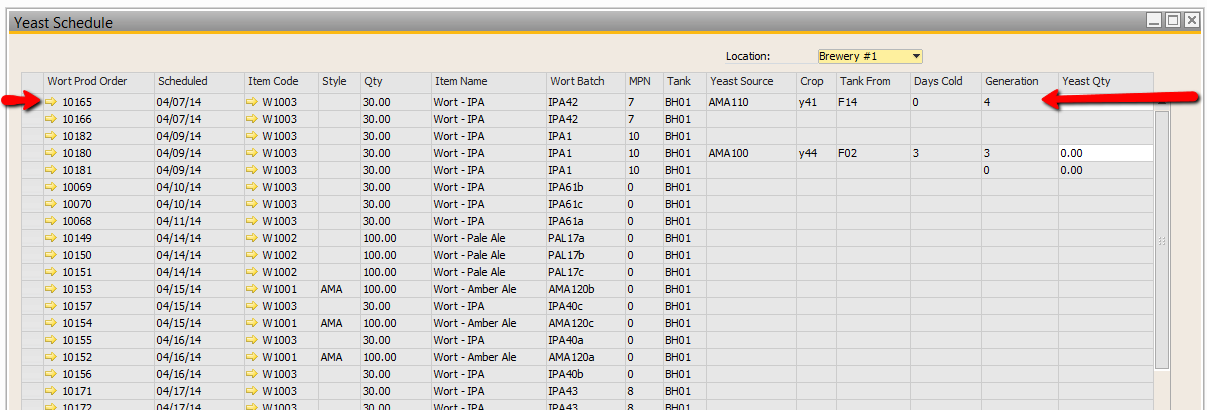
The Yeast Schedule screen opens up on a screen that displays all the existing planned or released production orders for brewing. On this screen we display the following fields:
| Wort Prod Order | Scheduled | Item Code | Style | Qty | Item Name | Wort Batch | MPN | Tank | Yeast Source | Crop | Tank From | Days Cold | Generation | Yeast Qty |
|---|---|---|---|---|---|---|---|---|---|---|---|---|---|---|
| PdO # | Prod Date | Wort Item | Style linked to wort item | Qty on PdO | Wort name | Wort Batch | Master Production # | Brewhouse or Fermenter for brew | Batch of beer in tank already selected | crop ID of yeast already selected | Tank the yeast is coming from if already selected | Number of days the beer in tank has been cold | number of times the crop has been used previsously | volume of yeast to use |
| The fields above all relate to the Wort Production orders already in the system | The fields above display any yeast info for Wort orders where the Yeast was already scheduled on the Yeast Scheduler | |||||||||||||
Screenshot of the Yeast Selection Screen
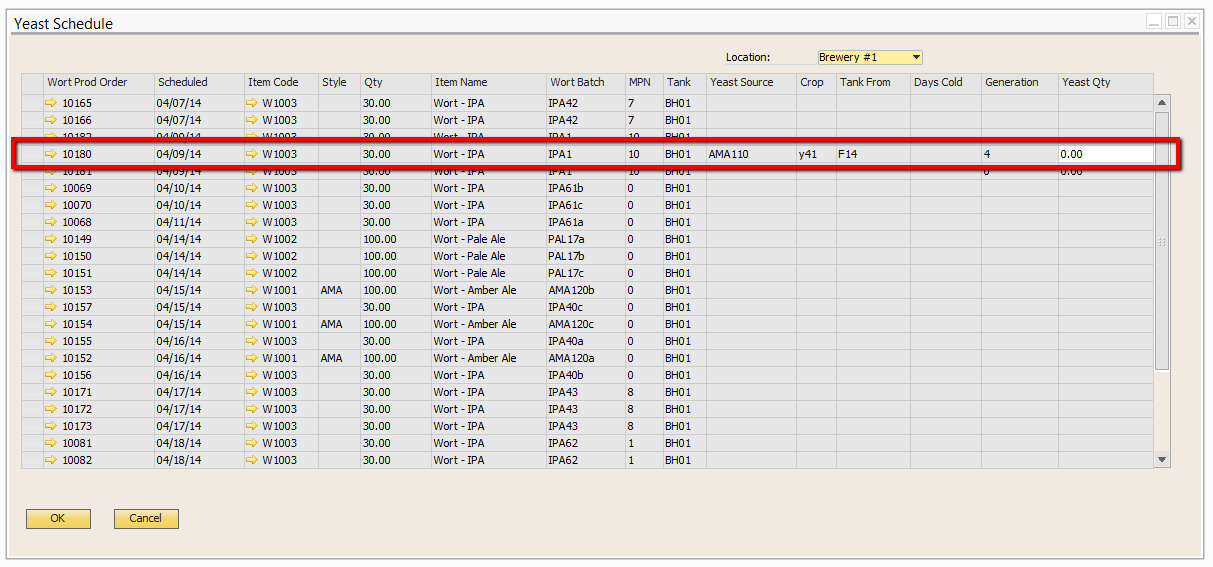
In the above example, you can see the Wort production orders that are displayed. The highlighted row is a Wort production order where the Yeast has already been Scheduled. You can see that we are planning to use yeast from Batch AMA110, which is Crop 41 and comes from tank F14. The Days Cold in this example is blank, because the tank has not yet been chilled.
Now, we'll schedule the yeast for production order 10165, the first row in the example above. To open the Yeast Selection screen, you double+click on the row of the production order you want to schedule. This will open the Yeast Selection Screen.
Yeast Selection Screen
The Yeast Selection screen displays all the batches of beer in fermenter that are available for Yeast Scheduling. The data displayed in this table is all about the batch of beer in each tank and the data needed to make a good decision about which yeast source to use.
The fields on this table are as follows:
| Batch | Tank | BBLs in Tank | Item Code | Style | Gen | Days Cold | Pitches | Chilled | Planned Chill | Transfer Date | Doc Num | Crop |
|---|---|---|---|---|---|---|---|---|---|---|---|---|
| Batch of beer in tank | Tank the beer is currently in | Volume of beer in the tank | Item Code | Style of Beer | Generation of the yeast (# of times the crop has been used in a cycle) | Number of days the beer has been cold | Volume of beer in tank needed for the volume of beer being produced (not commonly used) | Date the beer was flagged as being chilled on the Fermentation QC | Date the beer should have been chilled, based on the target on the style master for that beer | Date the beer came into stock in that tank | Document # the beer came into stock from | Crop ID of the yeast, typically assigned at initial creation of the yeast and used to help track generations. |
Screen shot of the Yeast Selection Screen
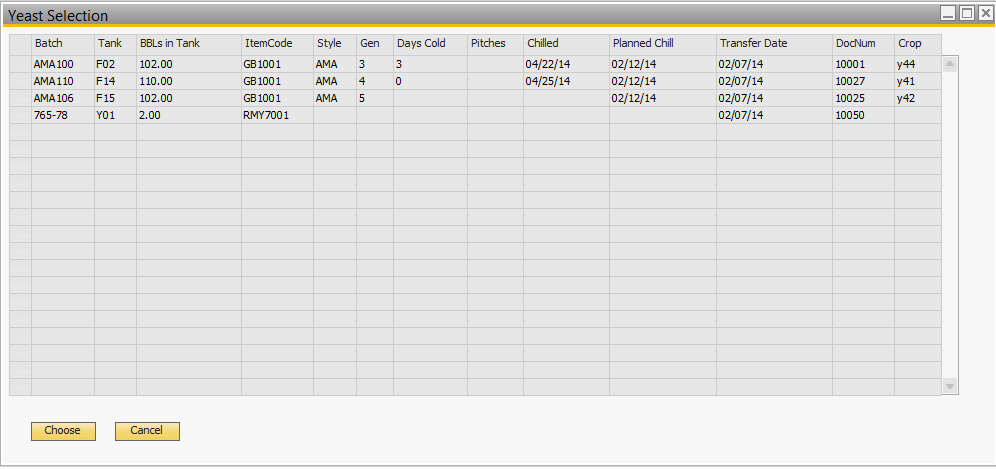
To select a batch of beer to use as your yeast source, you double click the row you want to use. In our example above, we're going to choose batch AMA100, where the beer has been chilled for 0 days (it has not yet been chilled).
Now you can see on the main Yeast Screen that the yeast source has been linked to my Wort production order
Yeast Display on Brew Sheet
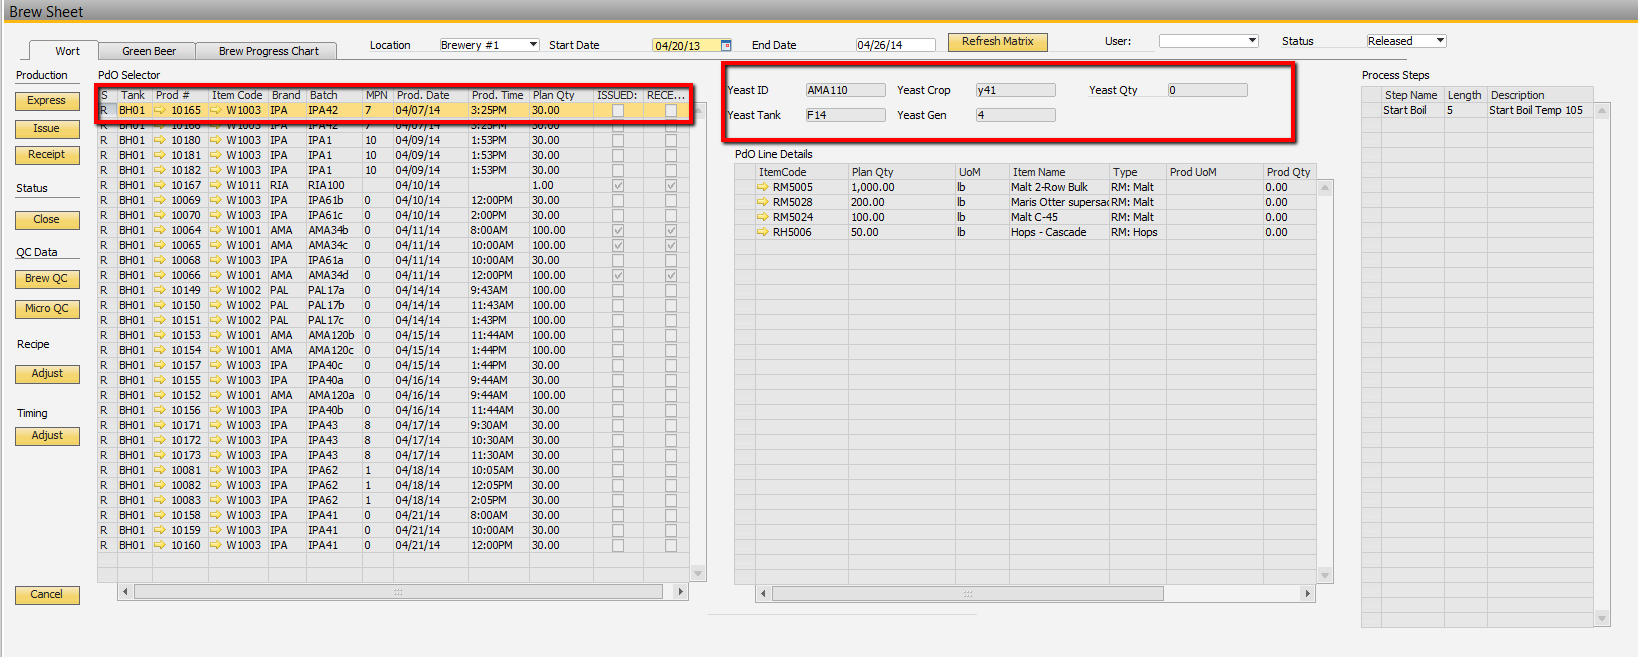
Now that we have selected the yeast source for Production Order 10165, we will open up the Brew Sheet and see how it is displayed to the brewer.
Below, we can see that when highlighting PdO 10165, the yeast fields in the center of the Brew Sheet display the yeast that we selected.
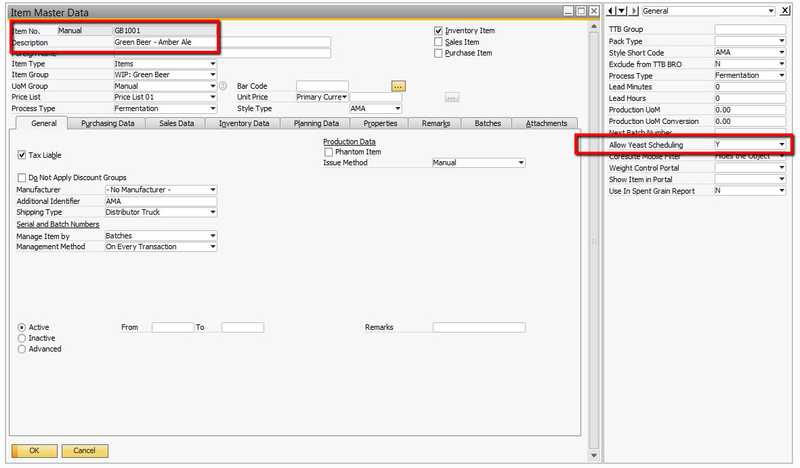
Yeast Scheduler Setup
There is only one setup needed for Yeast Scheduler, as seen below.
There is a flag on the item master that determines whether production orders will show up for yeast scheduling and which batches are available to use a source of yeast.
The yeast flag is a (UDF) User Defined Field (to view UDFs, go to View > User Defined Fields)
The Allow Yeast Scheduling Flag needs to be set on both the Wort items you want to schedule, and for the Green Beer items you want to use as a source of yeast.
The purpose of this flag is to limit certain beers to not be used as a source of yeast. Some breweries never use dry hopped beers as a source of yeast, for example, so you would set this flag = "No" to prevent that beer from being used in Yeast Scheduling.